Overview
Sharing previews for feedback is often part of your daily life as a designer, especially if you are working remote. In this guide we'll look at an efficient way to take screenshots of your work in After Effects, then optimize them for sharing. We'll explore a couple of third party tools and some of the native automation features available in Mac OSX to enhance our productivity. By the end you'll have a clear idea of how you can leverage those tools to build your own custom workflows.
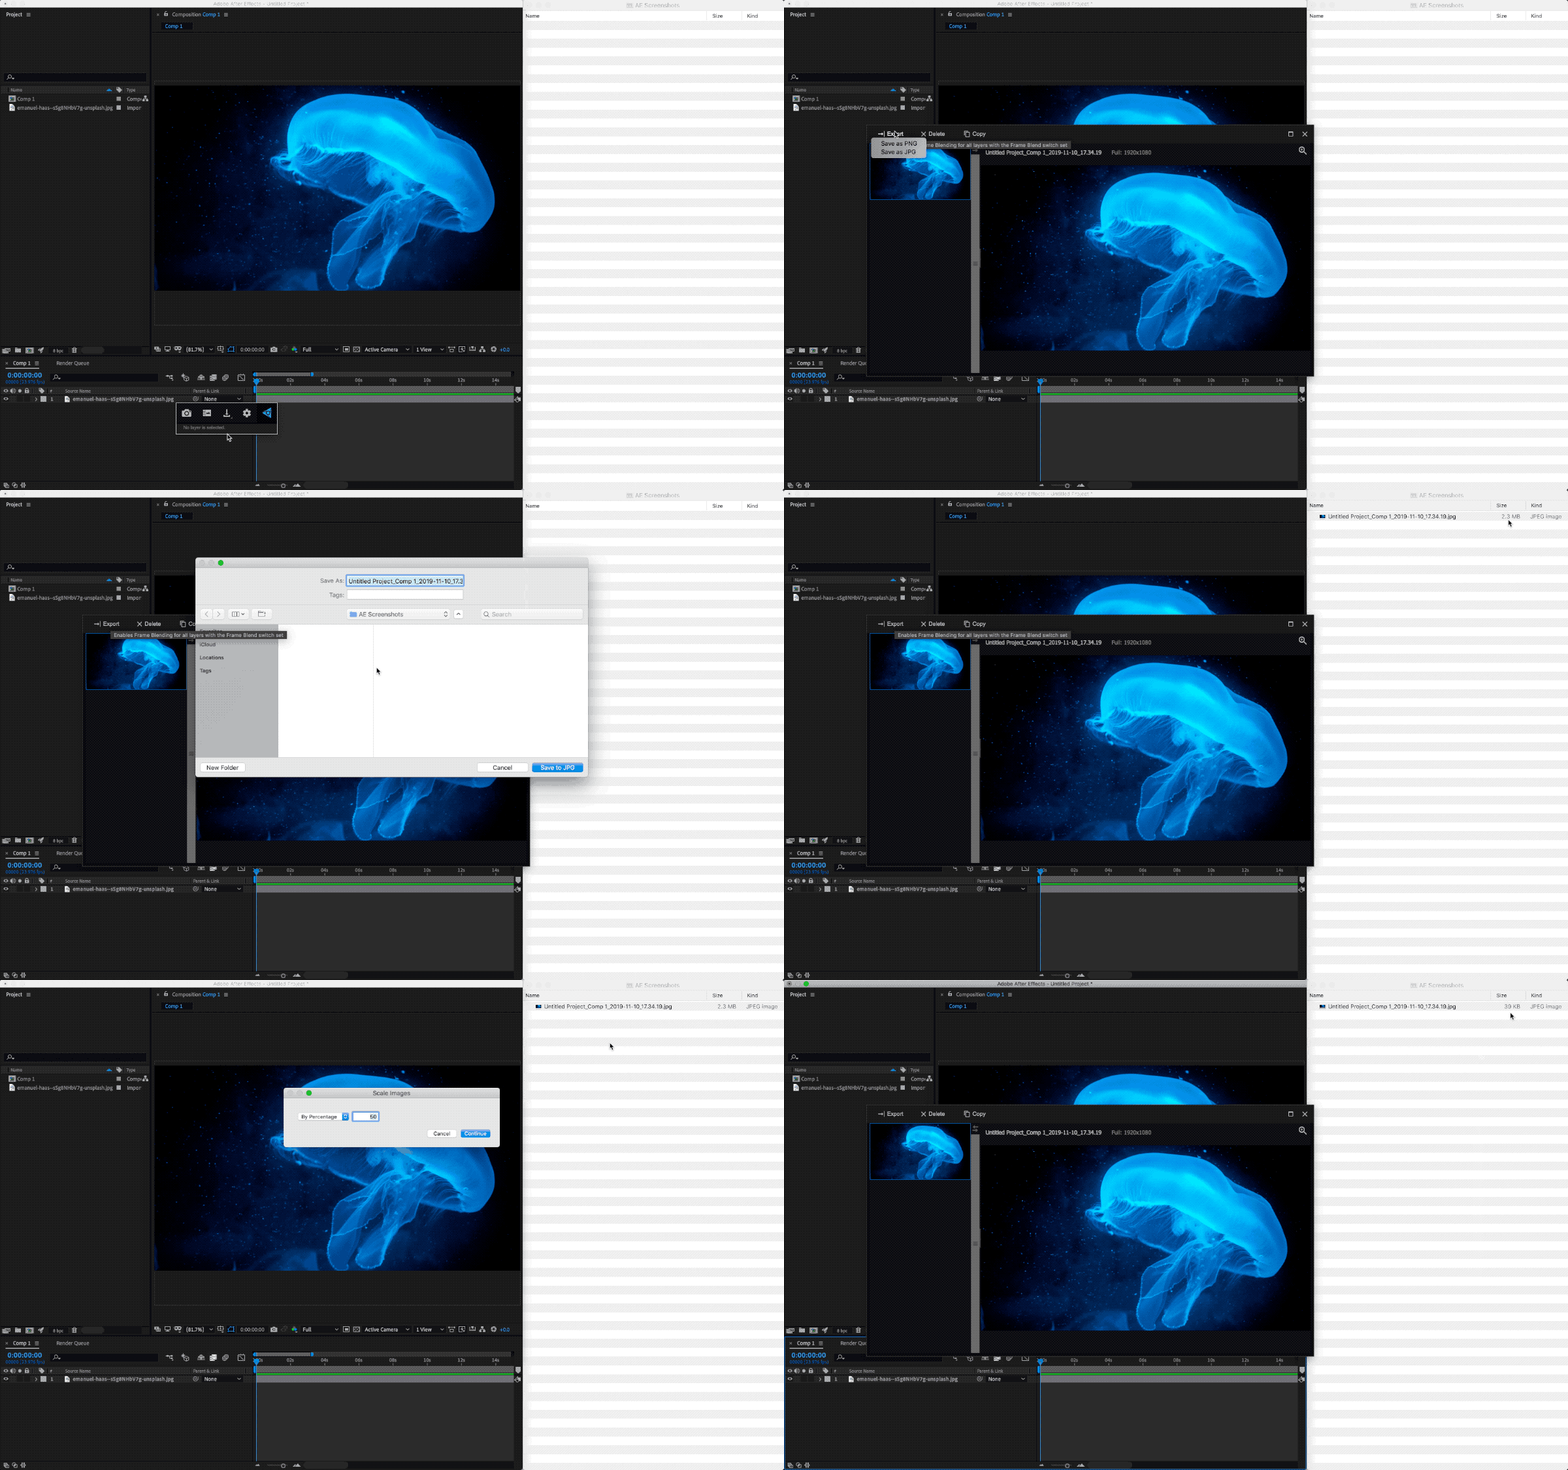
We’ll cover how to use the free FxConsole plugin (from Videocopilot) to take screenshots of your active comp. Then we'll setup a Folder Action in Mac OSX to automate the scaling and compression of the images once they are exported from After Effects.
So what is a Folder Action?
A Folder Action is a powerful OSX feature that allows you to attach tasks to a folder of choice. Whenever an item within the folder changes, the folder action is triggered.
In our case, we’ll setup a folder action that will detect and process images added to our folder once they are exported from After Effects. Here are the automated steps we want triggered immediately after the export:
- Folder detects added image
- Run scaling to conform the image to a predefined max width/height
- Run compression to reduce image JPG size
Tool Stack
Now that we have an idea of what we are building, let's familiarise with the tools we need before installing them.
Note: Direct links to each tool are provided below. PLEASE always double check to ensure that the software you are installing comes from reliable sources.
FxConsole: This is a free plugin by videocopilot that can noticeably boost your speed when using After Effects. It's an uninvasive utility that you can spawn with a keyboard shortcut. It allows you to search effects and presets, and to apply them in an instant. It feels like Spotlight on Mac OS. You can assign shortcuts to your favorite effects or assign priority levels so they come up faster when searching. What we are after though is the snapshot functionality it provides. With a click it will take a snapshot of your active comp at it's current resolution and store it in a gallery. You can access the gallery and select one or more snapshots to compare them in a grid. You can then export your selection as jpeg or png to a specified folder. More info and download from Videocopilot's official website.

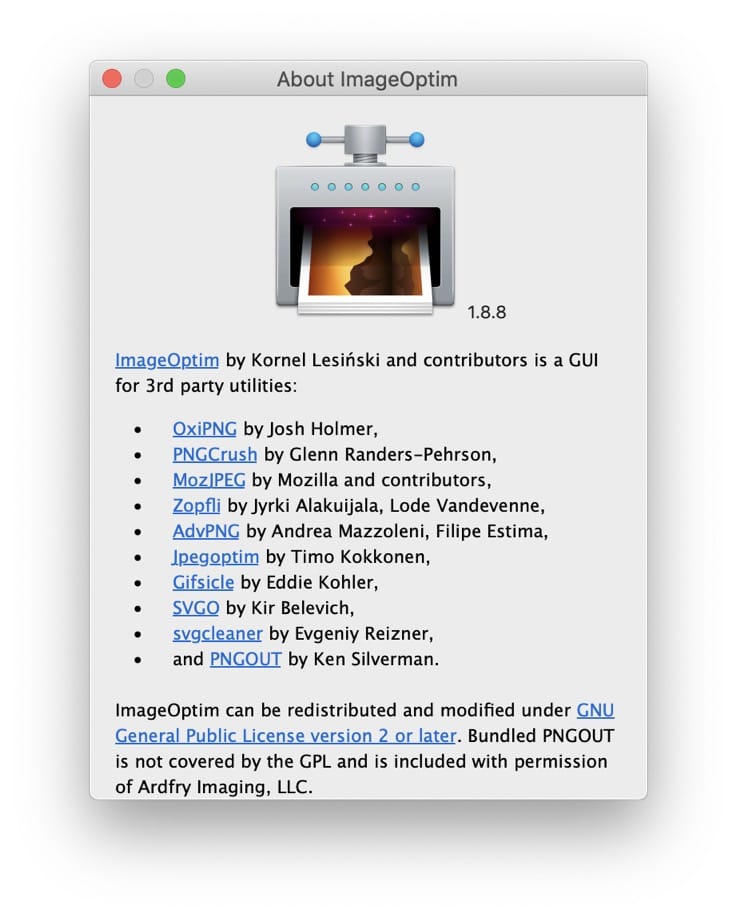
ImageOptim: This is an open source Mac OS drag and drop utility for rapidly compressing images. The current formats it handles are jpg, png, and gif. We'll use this to compress our images once exported from FxConsole. More info and download from ImageOptim's official website.
OSX Automator: This is a native app that comes preinstalled with Mac OS. It allows you to build custom workflows by stacking commands/actions via a simple drag and drop interface. It is Mac’s own solution to automate repetitive tasks. We'll use this to automate the optimization of our images.
Building our workflow
Let's open Automator so we can start building our Folder Action. You can find Automator in the Applications folder or by searching for it in Spotlight.
Once the welcome screen pops up, choose new Folder Action. We'll be presented with a blank canvas and a dropdown where you can select a folder for the action to be attached to. Choose the Desktop folder for now.

Get Specified Finder Items
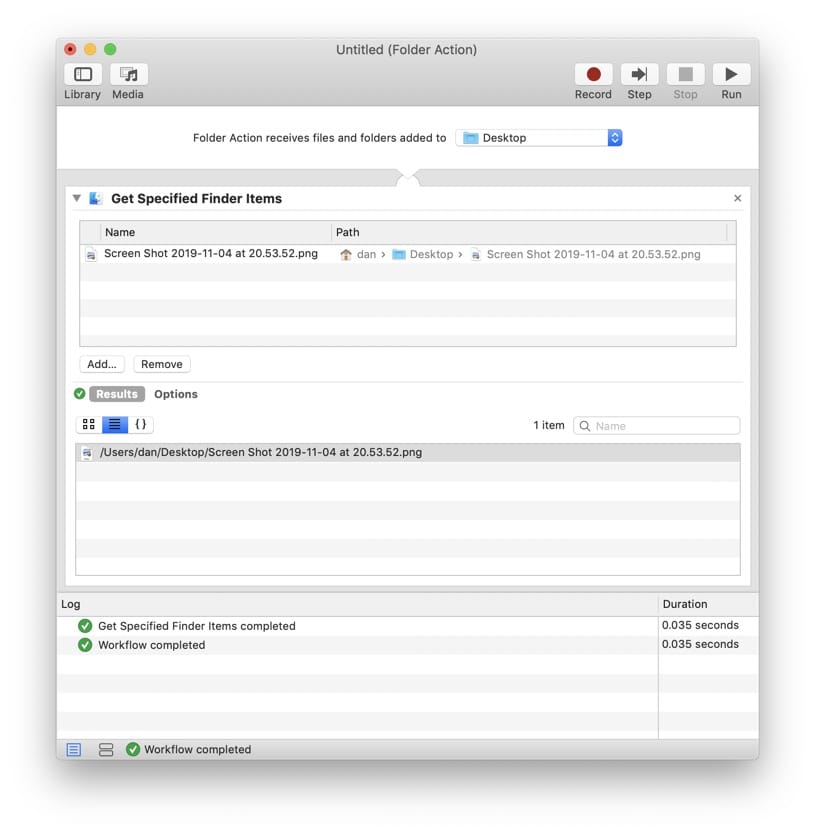
The first action to add is a temporary action we'll use for testing and what it does is allow you to specify files or folders and pass those on as input to the other actions. From the actions library, drag and drop the Get Specified Finder Items to the workspace. To test if this action works, take a quick fullscreen screenshot by pressing Shift Cmd 3. The screenshot should be automatically saved to the Desktop. Next choose to add a file within the Get Specified Finder Items action and select the newly taken screenshot.
Now hit play at the top of the workspace panel and, if everything works, green checkmarks should be displayed in front of each completed action. If you toggle the Results panel at the bottom of the action, the path to the previously added file should be displayed. This result will be passed on to the next action.
Scale Images
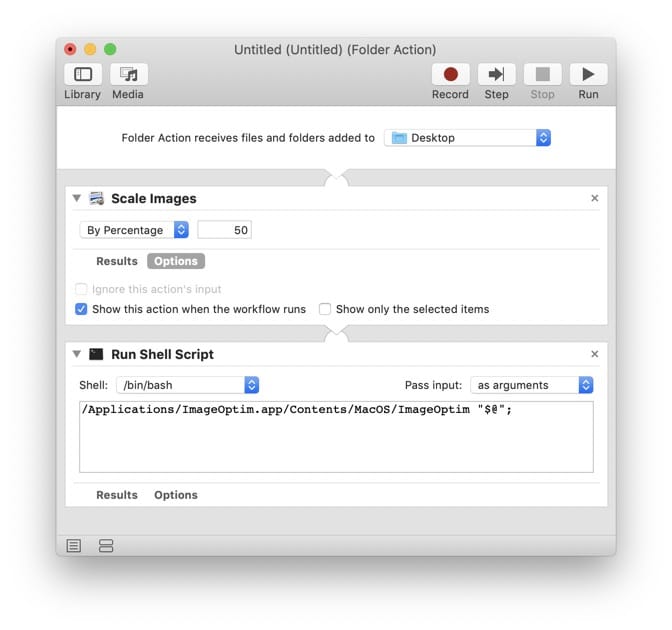
Let's add our next action then. Find the Scale Images action and drag and drop it onto the workspace after the Get Specified Finder Items action. Here we can specify how much scaling we want to apply to the image.

Note: By toggling the Options panel at the bottom of the Scale Images action, you will be presented with the option to show the action when the workflow runs. This is useful if you want to have more flexibility. If you turn the option on, a popup will appear where you can specify the scale you want - every time the folder action is triggered.
Compress Using ImageOptim
The next step requires you to have installed ImageOptim (you can refer to the Tool Stack section above).
We'll compress our images by sending a command to ImageOptim directly via the Command Line. This way ImageOptim will open, run the compression algorithms, and close again without us having to interact with it. The Command Line can be accessed in Automator using the Run Shell Script action.
Go ahead and drop the Run Shell Script below the last action. Now set the Pass Input dropdown to "as arguments". What happens here is that we will receive the path of each image from the previous action. We can then pass those paths to ImageOptim in a single line by using the special character $@ - this will return all values that have been passed in as arguments. Finally, make sure to wrap that single line in quotes so the paths are properly formatted. Here is the code you'll need to place in the Run Shell Script code block:
/Applications/ImageOptim.app/Contents/MacOS/ImageOptim "$@"Note: Not only do we need to specify the full path of ImageOptim, but also the actual script within the .app container. More info here: https://imageoptim.com/command-line.html

Your workflow should look like this:
WARNING: Beware of infinite loops!
When working with folder actions, a common mistake is to cause the workflow to run in a loop. Whenever a new file is created as a result 0f your actions, that new file will be detected by the folder action and the workflow will be triggered again - in turn creating a new file that will be detected and once again trigger the workflow... you see where this is going.
To terminate an Automator workflow that is stuck in a loop, you can open Activity Monitor and Force Quit the "com.automator.runner.xpc" process.

Deploying Our Folder Action
Disable or remove the Get Specified Finder Items action as we no longer will be needing this. Now save the folder action.
Note: Automator should save the folder action here:
/Users/{your_username}/Library/Workflows/Applications/Folder ActionsNow it's time to assign our newly created folder action to our folder of choice. Locate your folder of choice in Finder. Right click on the folder and choose Services > Folder Action Setup... from the popup menu. The Folder Action Setup window should appear with a list of actions. Locate and choose our previously saved folder action. The action should now be attached to your folder of choice.
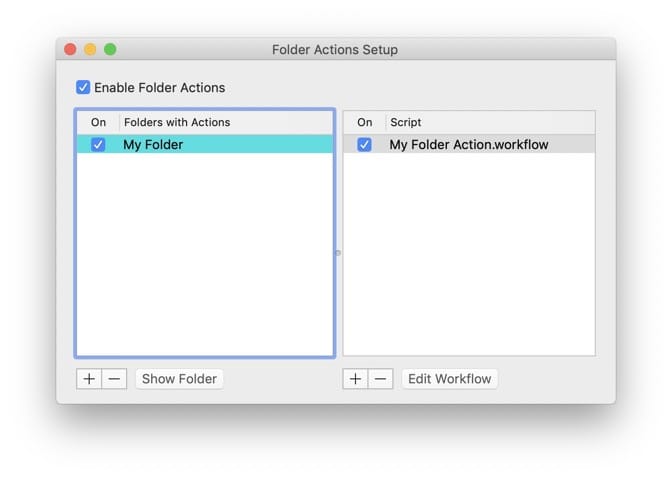
You'll notice that the same folder action is already attached to the Desktop folder. We had in fact specified this during the first step, as Automator doesn't let you save the action if a folder hasn't been specified. Simply select the Desktop folder and click on the (-) minus icon in the bottom left corner of the Folder Actions Setup window to remove all actions from it.
That's it! The Folder Actions Setup window allows you to manage all folders and their actions in one place. If you need to make a change to any workflow, simply open them in Automator, make your changes, and save.
With FX Console installed and accessible in After Effects, try taking a snapshot of your composition and saving it as a JPG to the folder you assigned the folder action to. Try saving the same image in a different location to view the difference in file size.
Note: To change compression settings open the ImageOptim app and access the preferences menu.
Additional Resources
Official Automator User Guide from Apple:

For another automation tip to enhance your workflow check out this other post:
