
Overview
In this guide we'll look at file metadata in OSX and how to use it for file renaming. We'll go over reading and extracting metadata from a file. Then, we'll look at how it can be formatted and used to rename files.

mdls to see a file's metadata, and the metaDateRenamer.sh script in action.Quick Reference
This section is a recap of the code samples used throughout the guide, that you can come back to for quick reference. For the Step by Step guide skip ahead.
Note: Additionally, you can find all code snippets on our Github Gist page.
Below is the completed script that we will be building. Although it is a working script it should act as a starting point that you can customize to better fit your needs. To use it, just paste the following code in a new text file and save it as metaDateRenamer.sh.
Note: You can rename it to whatever you please but make sure to keep the .sh extension. For more help check out the Intro to Shell Scripts section.
For a more user friendly version of this script, featuring interactive options selection visit:
 gfxhacks
To launch, open a new Terminal window and paste:
sh metaDateRenamer.sh file.ext kMDItemNamefile.ext is the file to be renamed, and kMDItemName is the metadata attribute name used for renaming. For more help refer to this section.Note: To access the manual page for any command in Terminal, type man commandName.
#!/bin/bash
#Cmd Usage: sh metaDateRenamer.sh file.ext kMDItemName

# Title: metaDateRenamer.sh
# Desc: Rename a file from a specified date metadata value.
# Author: gfxhacks.com
# More Info: https://gfxhacks.com/renaming-files-by-date-from-metadata
# kMDItem DATE descriptor options:
	# Common Metadata Attributes:
    	# kMDItemContentCreationDate
    	# kMDItemContentModificationDate
    	# kMDItemAttributeChangeDate
    	# kMDItemLastUsedDate
    	# kMDItemDateAdded
	# Audio Metadata Attributes:
    	# kMDItemRecordingDate
	# Filesystem Metadata Attributes:
    	# kMDItemFSContentChangeDate
        # kMDItemFSCreationDate

FILEPATH=`dirname "$1"`
FILENAME=`basename "$1"`
FILEEXT=`rev <<< "$1" | cut -d . -f 1 | rev`

# format date to: YYMMDDhhmm
DATETIME=`mdls -name "$2" "$1" | sed 's/[^0-9]//g' | cut -c 3-12`

echo "Rename to: "
read NAME

if [[ -f "$1" ]]; then

    # copy and rename the specified file
    cp "$FILEPATH/$FILENAME" "$FILEPATH/$NAME-$DATETIME.$FILEEXT"

    # rename the specified file w/o copy
    # mv "$FILEPATH/$FILENAME" "$FILEPATH/$NAME-$DATETIME.$FILEEXT"

else
    echo "ERROR: File not found. Try again!"
fiDirectly within Terminal
The snippets below can be run directly within Terminal (or include them in your custom script) for quick renaming.
Note: Make sure to specify your own filename.ext and all .ext instances. To overwrite the file, swap cp with mv.
# copy and rename file
cp filename.ext "newFileName-$(mdls -name kMDItemContentCreationDate filename.ext | sed 's/[^0-9]//g' | cut -c 3-14).ext"# copy and rename all files in folder with specified extension.
for i in folder/*.ext; do cp "$i" "SomeTextHere-$(mdls -name kMDItemContentCreationDate "$i" | sed -e 's/[^0-9]//g' | cut -c 3-8)-someMoreTextHere.ext"; doneBuilding Blocks
Following are some building blocks to help you create your custom snippets and scripts.
Datetime Format
2020-12-31 16:01:33 +0000
Note: These snippets are based on the Datetime format example provided above.
Reading Metadata
# read all metadata attributes
mdls file.ext

# get metadata attribute by name
mdls -name kMDItemContentCreationDate file.ext
# returns: kMDItemContentCreationDate = 2020-12-31 16:01:33 +0000

# get multiple metadata attributes by name
mdls -name kMDItemContentCreationDate -name kMDItemContentModificationDate file.ext
# returns: kMDItemContentCreationDate = 2020-12-31 16:01:33 +0000
# kMDItemContentModificationDate = 2020-12-31 18:21:48 +0000 mdls command.Formatting Date Metadata
mdls -name kMDItemContentCreationDate filename.ext | sed 's/[^0-9]//g' | cut -c 3-14
# returns: 201231160133 (YYMMDDhhmmss)

mdls -name kMDItemContentCreationDate filename.ext | cut -d " " -f 3
# returns: 2020-12-31 (YYYY-MM-DD)

mdls -name kMDItemContentCreationDate filename.ext | sed 's/-/_/g' | cut -d " " -f 3
# returns: 2020_12_31 (YYYY_MM_DD)
sed and cut commands.Extracting Path, Filename, and Extension:
FILEPATH=`dirname path/to/file.ext`
# returns: path/to

FILENAME=`basename path/to/file.ext`
# returns: file.ext

FILENAME=`basename path/to/file.ext | rev | cut -d . -f 2- | rev`
# returns: file

FILEEXT=`rev <<< path/to/file.ext | cut -d . -f 1 | rev`
# returns: extReferences


Step by Step Example
A file, including it's metadata, is represented by an object named MDItem in OSX. This is what Spotlight uses to help you search for your files.
Reading a file's metadata
To list a file's metadata we can use the dedicated command mdls - where ls stands for "list".
To use it just open a new Terminal window, and type mdls, tap the Spacebar, then drag and drop any file from the Finder to the Terminal window, and hit Enter.
mdls /path/to/file.ext
mdls to view a file's metadata.You should see a list of metadata attributes that belong to the file you specified. Cool!
Note: We will only cover mdls in this guide but there are other three available commands related to metadata: mdfind to search for files by metadata values, mdutil for managing metadata storage, and mdimport for testing and re-indexing files. You can see the documentation for any of those simply by typing man in Terminal, followed by the command: man mdfind.
Additionally, you can specify a metadata attribute by name, before the file path:
mdls -name kMDItemContentCreationDate path/to/file.ext
Hit enter and you should see the metadata item you specified and it's value.
E.g. kMDItemContentCreationDate = 2020-12-31 16:01:33 +0000
You can also specify multiple ones, like this:
mdls -name kMDItemContentCreationDate -name kMDItemContentModificationDate path/to/file.ext
# returns:
	# kMDItemContentCreationDate = 2020-12-31 16:01:33 +0000
# kMDItemContentModificationDate = 2020-12-31 18:21:48 +0000Date and Time File Metadata
Files often have multiple datetime metadata attributes. Among those that you will find with almost all file types are Creation Date and Modification Date - considered common metadata attributes. Depending on the type of file (image, audio, text...) there may be more or less attributes that can be specific to the file type.
Here is a list of datetime metadata attributes you are most likely to encounter:
Common Metadata Attributes
- kMDItemContentCreationDate: The date and time that the content was created.
- kMDItemContentModificationDate: Date and time when the content of this item was modified.
- kMDItemAttributeChangeDate: Date and time of the last change made to a metadata attribute.
- kMDItemLastUsedDate: Date and time that the file was last used. This value is updated automatically by LaunchServices every time a file is opened by double clicking, or by asking LaunchServices to open a file.
Audio Metadata Attributes
- kMDItemRecordingDate: Recording date of the song or composition. This is in contrast to kMDItemContentCreationDate which, could indicate the creation date of an edited or "mastered" version of the original art.
Filesystem Metadata Attributes
- kMDItemFSContentChangeDate: Date the file contents last changed.
- kMDItemFSCreationDate: Date that the contents of the file were created.
A complete list of all metadata attributes can be found on the Apple Developer Website.
Each Datetime metadata value is presented in the same format, let's understand better what this is.
The Datetime Standard Format
It's always important to understand what data you are working with.
Dates come in this standard format: YYYY-MM-DD hh:mm:ss +TZD.
Here is an example for reference: 2020-12-31 16:01:33 +0000.
Note: The Time Zone Designator (TZD) is the Time Offset (in hh:mm) from the UTC/GMT time: +0000. In our example the time is local to the Greenwich Mean Time (GMT).
Find out more about Datetime standards on the World Wide Web Consortium (W3C) website.
Formatting Datetime with Sed
Once we choose a Datetime attribute to work with, we can then format it. Since we want to use it in a filename, we may want to remove any whitespaces or special characters from it. To perform this kind of text manipulation we can use the sed command in Terminal.
Sed is a stream editor. A stream editor is used to perform basic text transformations on an input stream (a file or input from a pipeline).
We can us it, for example, to substitute a word with another in a given input. Like this - where we want to replace the one's with two's:
sed 's/one/two/' "one plus one is 4"
sed substitution example.s stands for substitute, one is the word to replace, and two is the word to replace one with. / is the symbol used as a delimiter for the pattern, but you can also use +.
Note: Read more about the s flag in the sed manual.
Now, if you run this in your Terminal window you will get an error, since sed is expecting a file instead of a string (as with most commands):
sed 's/one/two/' file.txtsed expects a file as input.To pass a string into the sed command we have a few options:
Piping
We print the filename first, then pass it as a string to the following command, using the | symbol:
echo "one plus one is 4" | sed 's/one/two/'
# returns: two plus one is 4echo output to the sed input.Note: We'll get to see why only the first instance of one was changed and how to address that, later.
To understand piping you need to be familiar with how the UNIX shell works (on OSX, by default, we use the Bash UNIX shell). In practice, it works with streams of characters. There are three standard streams in UNIX Shells:
stdout: Output from a command.stdin: Input to a command.stderr: Error from a command.
We can apply this knowledge to understand what's going on in the code sample above. Where the output of the echo command (that simply returns the string as is) is passed on as input to the sed command so that it can perform it's operation. We can continue to pipe command outputs to new command inputs simply by appending those new commands, separated by |.
Here Strings
When working with single line strings, we can use this method to pass strings as standard input to the command. The syntax is: <<<.
sed 's/one/two/' <<< "one plus one is 4"
# returns: two plus one is 4<<< to pass the string as input to the sed command.Here Strings can be considered a stripped down version of Here Documents. More info on Wikipedia.
Substituting all instances
By default, the substitution occurs only for the first instance found. To apply the substitution to all instances we can use the g flag.
Note: You can also specify the exact number of instances to be substituted. Read more about it in the sed manual entry for s - just scroll down until you find the g entry.
sed 's/one/two/g' <<< "one plus one is 4"
# returns: two plus two is 4g flag.Formatting datetime
In our example, we are trying to get a date string formatted as: YYMMDDhhmm e.g: 2012311601, from a string that originally looks like this:
kMDItemContentCreationDate = 2020-12-31 16:01:33 +0000We can start by removing all non-digit characters by searching for them first. Then removing them.
In sed we can use a regular expression to define the search pattern.
A regular expression (shortened as regex or regexp; also referred to as rational expression) is a sequence of characters that define a search pattern. Usually such patterns are used by string searching algorithms for "find" or "find and replace" operations on strings, or for input validation. — Wikipedia.
Regular expressions can get fairly complex but in our case it is rather straightforward: [^0-9]. This is known as a Set Expression, and the ^ specifies a negation. Practically, it will go through the string and match any character that is not within the range of 0 to 9 - is not a digit. Once the match is found it will replace that character with empty.
mdls -name kMDItemContentCreationDate file.ext | sed 's/[^0-9]//g'
# returns: 202012311601330000Now that we have only the digits, we can choose to extract a specific set. To achieve this we can use a different command: cut.
Note: You can find all about regular expressions here: https://www.regular-expressions.info.
Slicing the formatted string with the Cut command
The cut command is a nimble utility that can be used to extract text from an input. We'll use it to strip any unwanted digits from our sed output: 202012311601330000, in our example to obtain: 2012311601.
The cut command uses characters: -c or delimiters: -d to perform it's slicing actions.
Slicing by Characters
When using the -c flag, we need to specify a range.
Let's look at some examples:
# Extract from the string start to the 4th character.
cut -c -4 <<< 202012311601330000
# returns: 2020 (YYYY)

# Extract from character 5 to 8.
cut -c 5-8 <<< 202012311601330000
# returns: 1231 (MMDD)

# Extract the last 4 characters...
# ...so from 15 until end of string.
cut -c 15- <<< 202012311601330000
# returns: 0000 (TZD)-c examples.So for our purpose we can use:
# YYMMDDhhmm
cut -c 3-12 <<< 202012311601330000
# returns: 2012311601YYMMDDhhmmSlicing by Delimiters
When using the -d flag, we need to specify a delimiter and a field. Whenever a character that matches the specified delimiter is encountered, the string will be split at that point. The resulting segments are known as fields. It will then look through the string for any other instances and continue splitting the string into separate fields. Let's look at an example:
# YYYY-MM-DD
cut -d " " -f 1 <<< 2020-12-31 16:01:33 +0000
# return: 2020-12-31-d.In the above example, the specified delimiter is a space " ". Therefore the command searches for all spaces in the string, and encounters 2. It then splits the string where each space is located, returning three fields:
f1: 2020-12-31
f2: 16:01:33
f3: +0000cut operation.Finally it returns the specified field, -f 1 in our example above. You can specify multiple fields using comma, or a range using dash.
# single field
-f 1
# returns: 2020-12-31

# multiple fields
-f 1,3
# returns: 2020-12-31 +0000

# range of fields
-f 1-3
# returns: 2020-12-31 16:01:33 +0000cut operation.We used cut with the -c flag to format the date in our script, but we'll use cut with the -d flag somewhere else: to isolate the file extension.
Extracting Path, Filename, and Extension
When dropping a file into the Terminal window, we are shown the full path of that file (including filename and extension) e.g: /Users/yourUsername/Desktop/image.jpg. In this section we'll go over how to extract each component of a file path.
In Terminal, there are two utilities that handle this for us: dirname and basename.
Extracting Path
Use dirname to extract the path.
dirname path/to/file.ext
# returns: path/to
dirname to extract the path.Extracting Filename
Use basename to extract the filename, including the extension.
basename path/to/file.ext
# returns: file.ext
basename to extract filename and extension.Extracting Extension
There is no utility for separating the extension from the filename. But we can use a simple yet effective method to accomplish this.
rev <<< path/to/file.ext | cut -d . -f 1 | rev
# returns: extYou should now be familiar with the <<< operator - to pass the filename as string to the rev command. We are also using the cut command with the delimiter option -d.
The rev command simply reverses whatever input is passed to it: hello -> olleh.
Keeping in mind that pipes | are used to pass the output of one command as input to the next, let's go over each step.
If we pass the filepath as a string to the rev command, it gets reversed:
rev <<< path/to/file.ext
# returns: txe.elif/ot/htap
rev reverses the input.Let's pipe this to our cut command. We want to cut everything after the first . (period) symbol - that denotes the end of the extension.
rev <<< path/to/file.ext | cut -d . -f 1
# the delimiter is applied so that
# f1= txe
# f2= elif/ot/htap
# choosing f1 returns: txeWe can now use rev again to reverse the string to it's correct form. Done!
Copy and Move Commands
Those two commands are similar to when you are copying or moving files in the Finder. They have a similar structure and options. Use them by specifying the command first, then the current filename followed by the new name.
# copy to same directory
cp path/one/file_oldName.ext path/one/file_newName.ext

# overwrite old file name with new name
mv path/one/file_oldName.ext path/one/file_newName.ext

# copy to another directory
cp path/one/file_oldName.ext path/two/file_newName.ext

# move to another directory
mv path/one/file_oldName.ext path/two/file_newName.extNote: Make sure to check their man pages as there are a few extra options you can specify.
Building the Script
Now we are ready to put the pieces together and build our custom script. It's important to know that those commands can be run one by one, directly in Terminal, but that's something to avoid when running many commands. That's where a Shell script comes in handy.
Intro to Shell Scripts
A Shell script is a program that can be run in the UNIX shell. Essentially a collection of commands that when run, are processed sequentially - one after the other.
A Shell script is identified by the .sh extension. To run it in Terminal, we can simply type in sh myScript.sh.
Note: There are other ways to run a shell script, including double clicking on the file in Finder (see How to Run a Bash Shell Script), or running it from AppleScript or Automator.
Here is the complete script:
#!/bin/bash

FILEPATH=`dirname "$1"`
FILENAME=`basename "$1"`
FILEEXT=`rev <<< "$1" | cut -d . -f 1 | rev`

DATETIME=`mdls -name "$2" "$1" | sed 's/[^0-9]//g' | cut -c 3-12`

echo "Rename to: "
read NAME

if [[ -f "$1" ]]; then

    # copy and rename the specified file
    cp "$FILEPATH/$FILENAME" "$FILEPATH/$NAME-$DATETIME.$FILEEXT"

    # rename the specified file w/o copy
    # mv "$FILEPATH/$FILENAME" "$FILEPATH/$NAME-$DATETIME.$FILEEXT"

else
    echo "ERROR: File not found. Try again!"
fiThere are a few outstanding elements to discuss:
Note: The first line: #!/bin/bash, defines the path to the Shell in which to run the script in. In our case, since we are launching the script directly from Terminal using the sh command, it can be omitted - but it's best practice to have there.
Variables
We can store a piece of data and refer to it using a variable.
To define a variable use this format: VAR=myVar.
To call it, use $VAR.
There are also predefined variables that store data about your current system. These are known as system variables.
Here are some examples:
NAME="gfxhacks.com"
echo $NAME
# returns: gfxhacks.com

TEN=10
echo $TEN
# returns: 10

# This is a system variable
echo $USER
# returns: {your username}Note: It is a convention to use UPPERCASE for Unix shell variables but you can choose not to. Accepted characters are: a-z, 0-9, and _. Read more about Shell variables here: https://www.tutorialspoint.com/unix/unix-using-variables.htm.
User Defined Arguments
The $1 and $2 are arguments and they represent user inputs, passed to the script on launch. In our example we are requiring 2 arguments: the file to rename, and the name of the date metadata, used to rename that file. We can simply chain any additional arguments that can then be referred to in the script using $3, $4 etc...
Note: When calling user defined arguments in the script, we wrap them in "" quotes to interpret them as strings, making sure any special characters are properly escaped. There are some exceptions as well as a distinction between single and double quotes. Read more about using quotes in bash here: https://bash.cyberciti.biz/guide/Quoting.
#					         $1                   $2
sh metaDateRenamer.sh path/to/file.ext kMDItemContentCreationDate

# Then, in the script:
DATETIME=`mdls -name "$2" "$1" | sed 's/[^0-9]//g' | cut -c 3-12`

# translates to:
DATETIME=`mdls -name "kMDItemContentCreationDate" "path/to/file.ext" | sed 's/[^0-9]//g' | cut -c 3-12`Prompting for User Input
The read command prompts the user for input and, once received, will store it in the specified variable (in our example: NAME). The preceding echo describes the requested input - in our case the new filename to which we will append the extracted date value. If you are unfamiliar with echo, it is a command that outputs to the console whatever string is passed to it.
Checking if a File Exists
Finally, we can wrap the copy or move command in a conditional statement that checks if the specified file exists. If it does, then run the command, if not, inform the user about the it.
The conditional statement syntax is:
if condition; then
	do something
else
	do something else
fiand to check if the file exists:
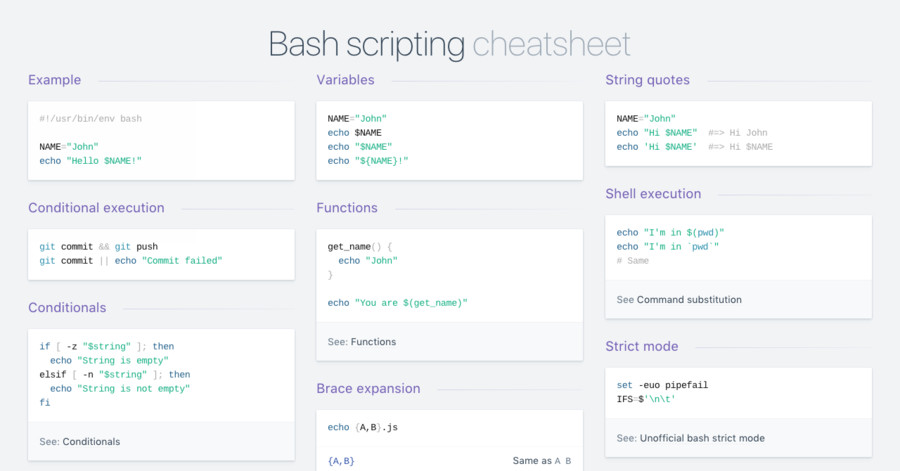
if [[ -f "$1" ]]; thenNote: You can find a list of conditionals here: https://devhints.io/bash#conditionals.
Conclusion
Hopefully this guide has provided you with valuable insight into how to handle metadata in OSX and the foundations for building your own Shell scripts.
Additional Resources


 repl.it