Overview
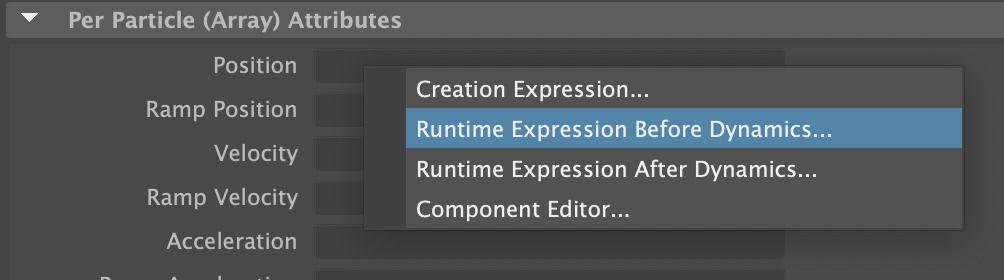
To connect the nParticle's position to the MASH points position we can use this simple expression, at both creation and runtime - by adding it to the nParticle's position parameter (nParticleShape -> Per Particle (Array) Attributes -> [Right mouse button click]: Position parameter -> Runtime Before Dynamics Expression...):
nParticleShape1.position = MASH.inPositionPP;To achieve something like this:
that can be used to create something like this:
Read on for a step by step walkthrough.
Scene Setup
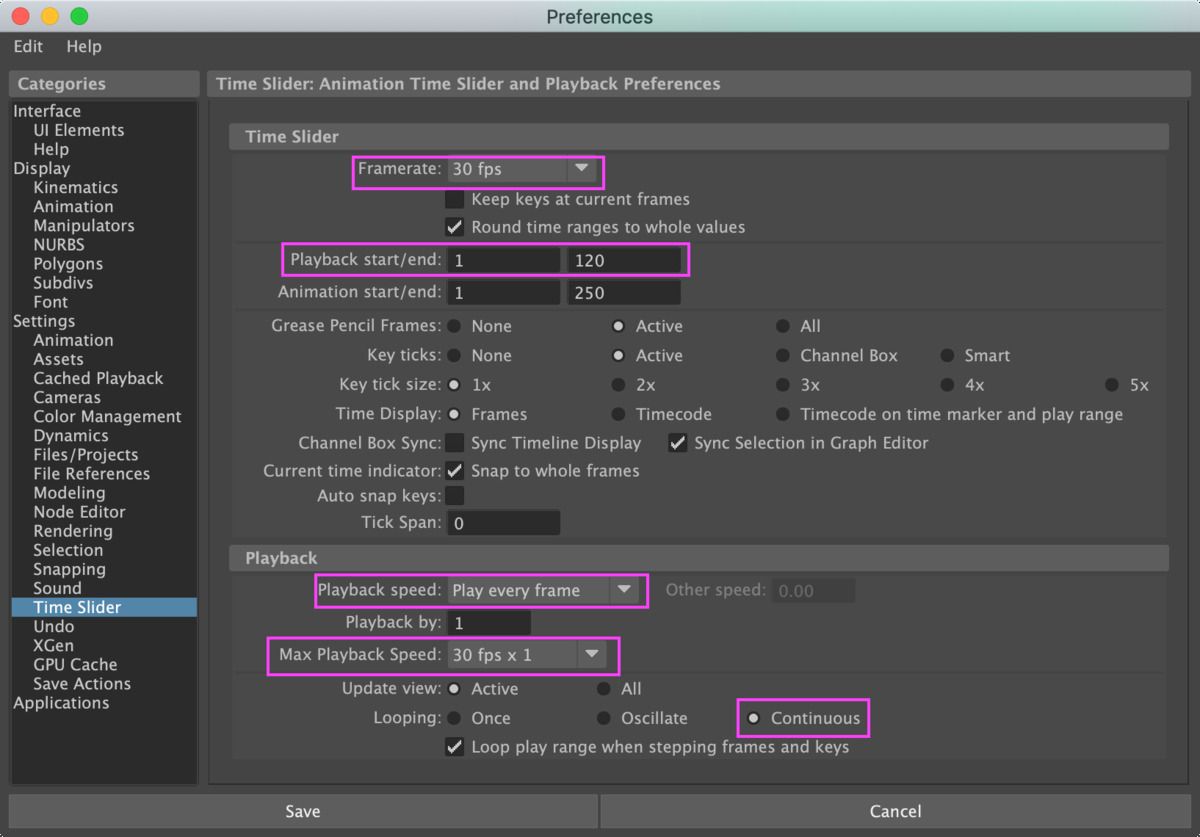
In a new Maya scene, go to your Maya preferences, then choose Time Slider under Settings. Make sure you have those values:
- Time Slider | Framerate:
30 fps - Time Slider | Playback start/end:
1 / 120 - Playback | Playback speed:
Play every frame - Playback | Max Playback Speed:
30 fps x 1 - Playback | Looping:
Continuous
Create a new poly sphere (Create -> Polygon Primitives -> Sphere).
Select the new sphere and create a new MASH network (MASH -> Create MASH Network).
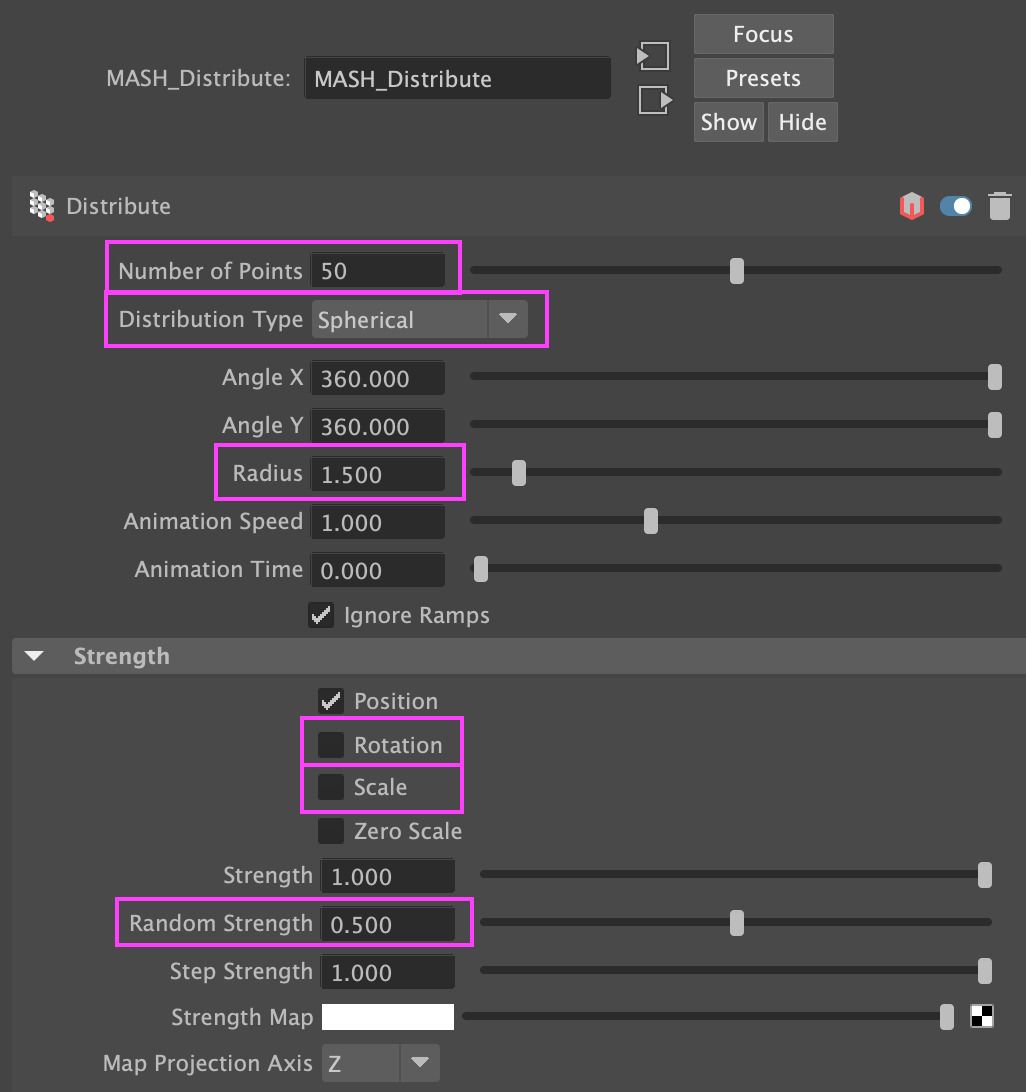
Select the distribute node of the MASH network and in the Attribute Editor panel set those values:
- Distribute | Number of Points:
50 - Distribute | Distribution Type:
Spherical - Distribute | Radius:
1.5 - Strength | Rotation:
off - Strength | Scale:
off - Strength | Random Strength:
0.5
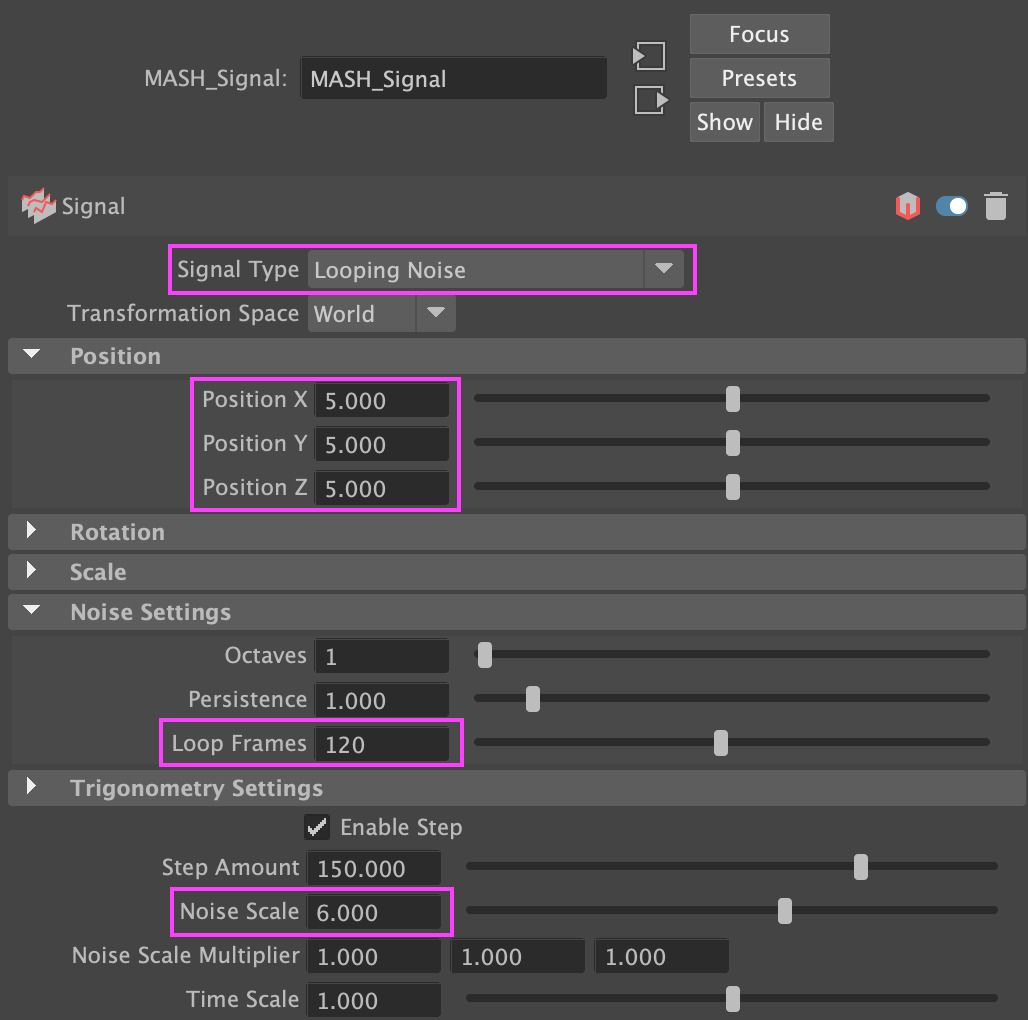
Now go to the main MASH node and add a new Signal node. This node gives us the ability to generate looping noise. We can conveniently specify the loop duration in frames. For the purpose of our example, set those values:
- Signal Type:
Looping Noise - Position | Position X:
5 - Position | Position Y:
5 - Position | Position Z:
5 - Noise Settings | Loop Frames:
120 - Trigonometry Settings | Noise Scale:
6
Next, let's create an array of nParticles using the nParticle Tool (nParticles -> nParticle Tool). Make sure to click on the box icon next to the tool to open the tool preferences. In the Particle Settings, change the Number of Particles to the number of MASH points you defined earlier. In our example: 50.
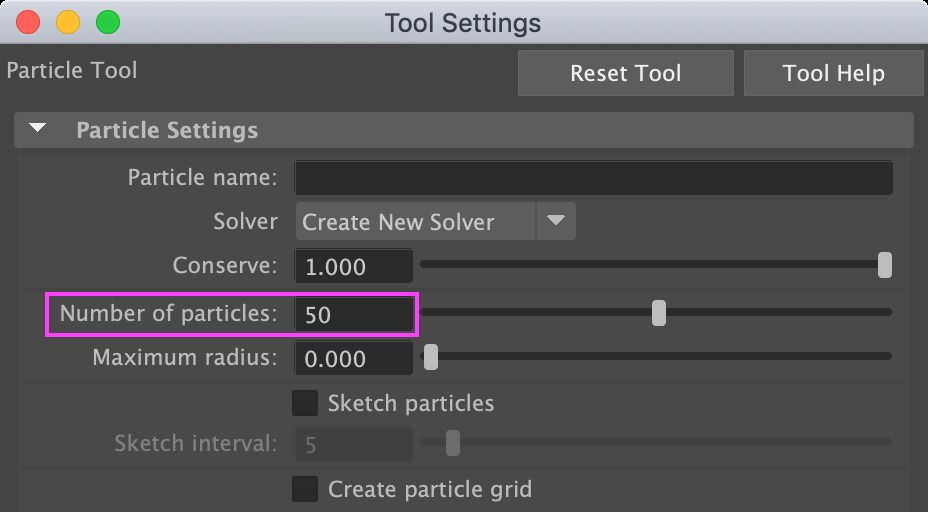
Click in the viewport and you should see a red cross - showing where the 50 particles will be created. Hit Enter on your keyboard and you should see a single dot appear - all 50 points share the same position.
Select the new nParticles and navigate to the attribute editor of its child element: nParticleShape.
Now let's alter some parameters to better visualize our particles in the viewport:
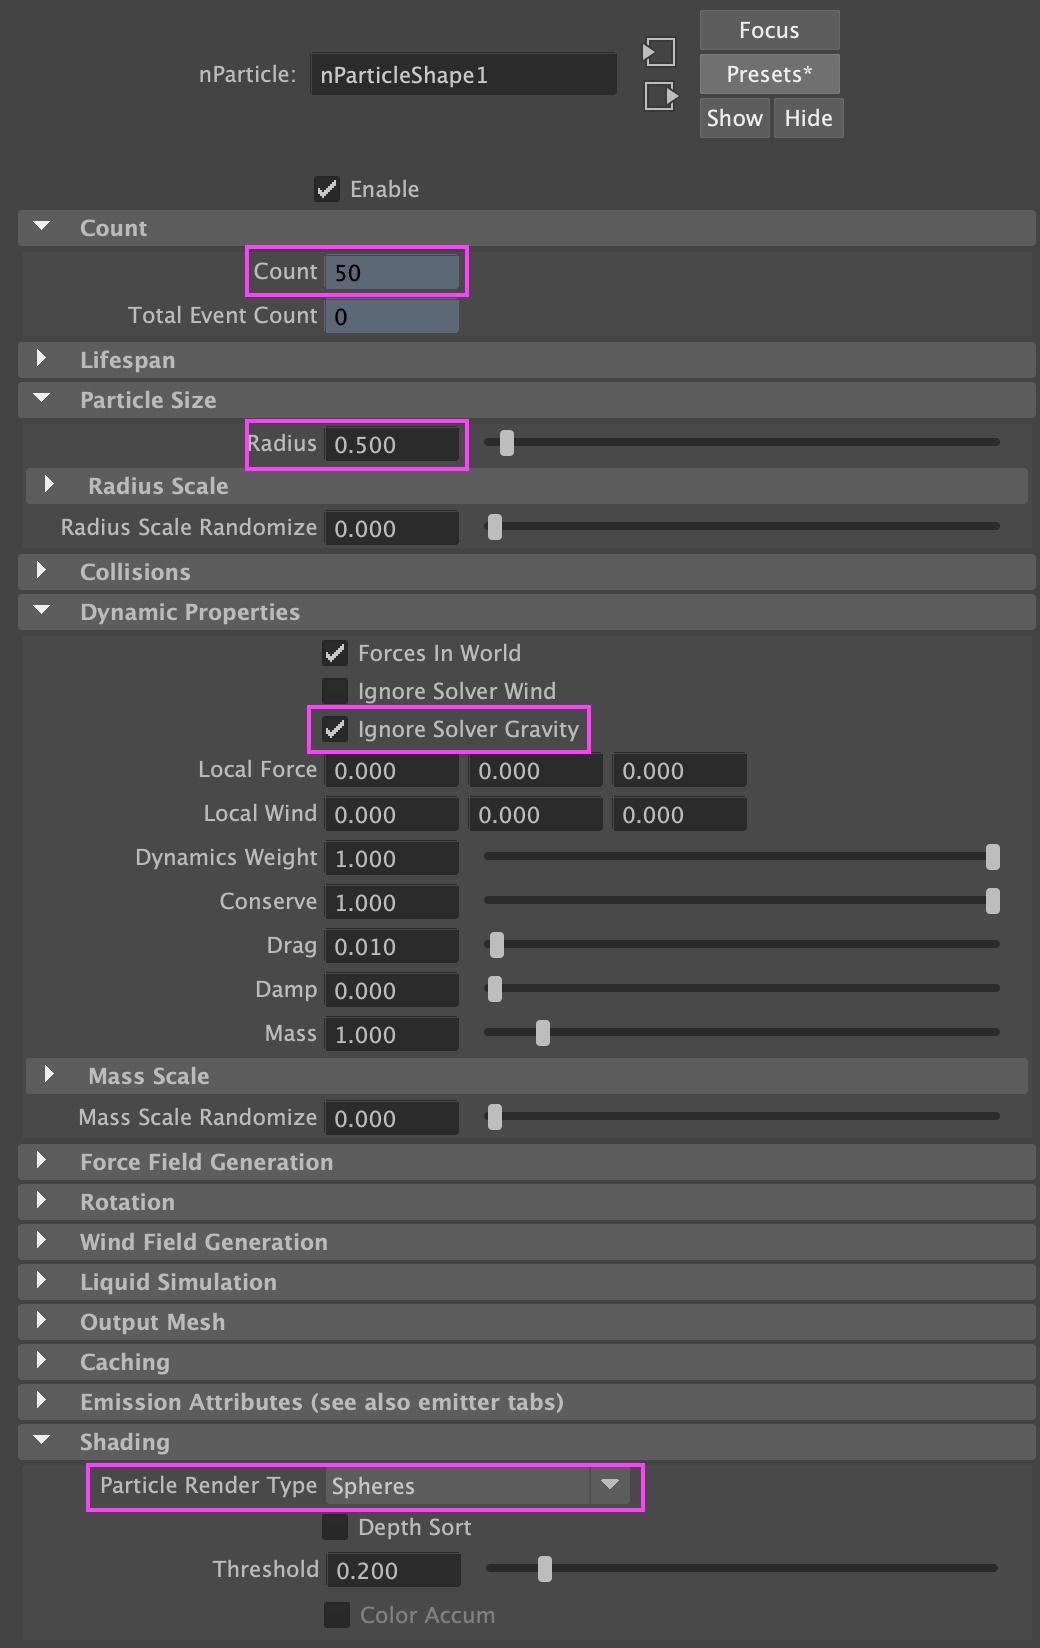
- Particle Size | Radius:
0.5 - Shading | Particle Render Type:
Spheres
If you hit Play on your timeline, the particles will start to fall due to the gravity of the Solver. To avoid this, head over to the Dynamic Properties section and turn on the Ignore Solver Gravity:
- Dynamic Properties | Ignore Solver Gravity:
on
Note: Under Count, notice the number of particles (should be 50 - remember we set this in the nParticle tool). If there are more particles than MASH points, the referenced position will just cycle. So if there are 51 nParticles and only 50 MASH points, nParticle 51 will reference the properties of MASH point 1.
Connecting Attributes
Let’s connect the MASH points position to the nParticle's position by scrolling down until you find the Per Particle (Array) Attributes section. Right click in the field of the position parameter and select Runtime Before Dynamics Expression... .
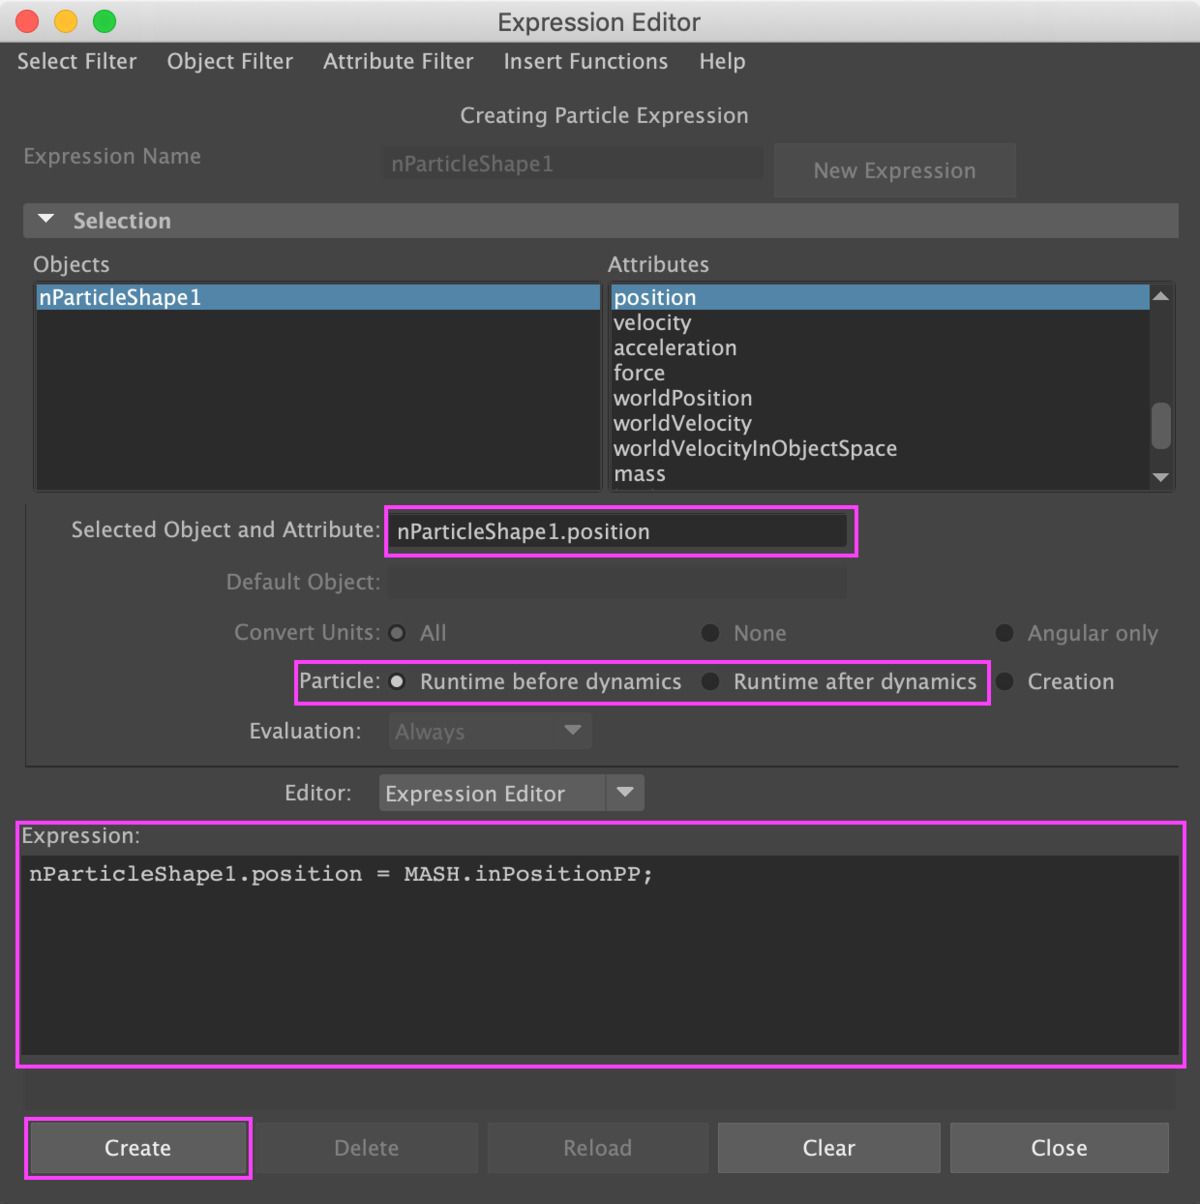
The expression editor should show up. Copy the Selected Object and Attribute as shown in the field, paste it in the Expression field. Alternatively Middle Mouse button drag it.
Then, write the rest of the expression so it looks like this:
nParticleShape1.position = MASH.inPositionPP;
Once you're done, click on Create.
Now hit play on your timeline and you will see the nParticles reposition to match the center of the MASH points.
Note: You may want to toggle wireframe mode in the viewport to see both the nParticle spheres and MASH spheres.
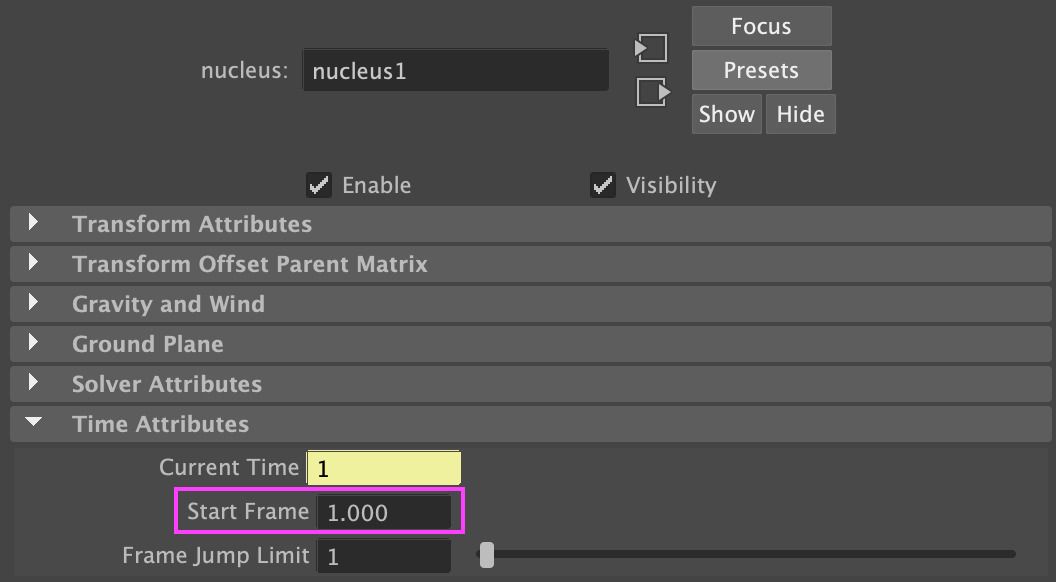
The issue you may have noticed is that on frame 1 the nParticles don't match the position of the MASH points. This occurs since we only added the expression at runtime - meaning it get's evaluated every time the input value changes after the start frame: frame 1.
Note: You can change the start time in the Nucleus solver attributes under the Time Attributes section.
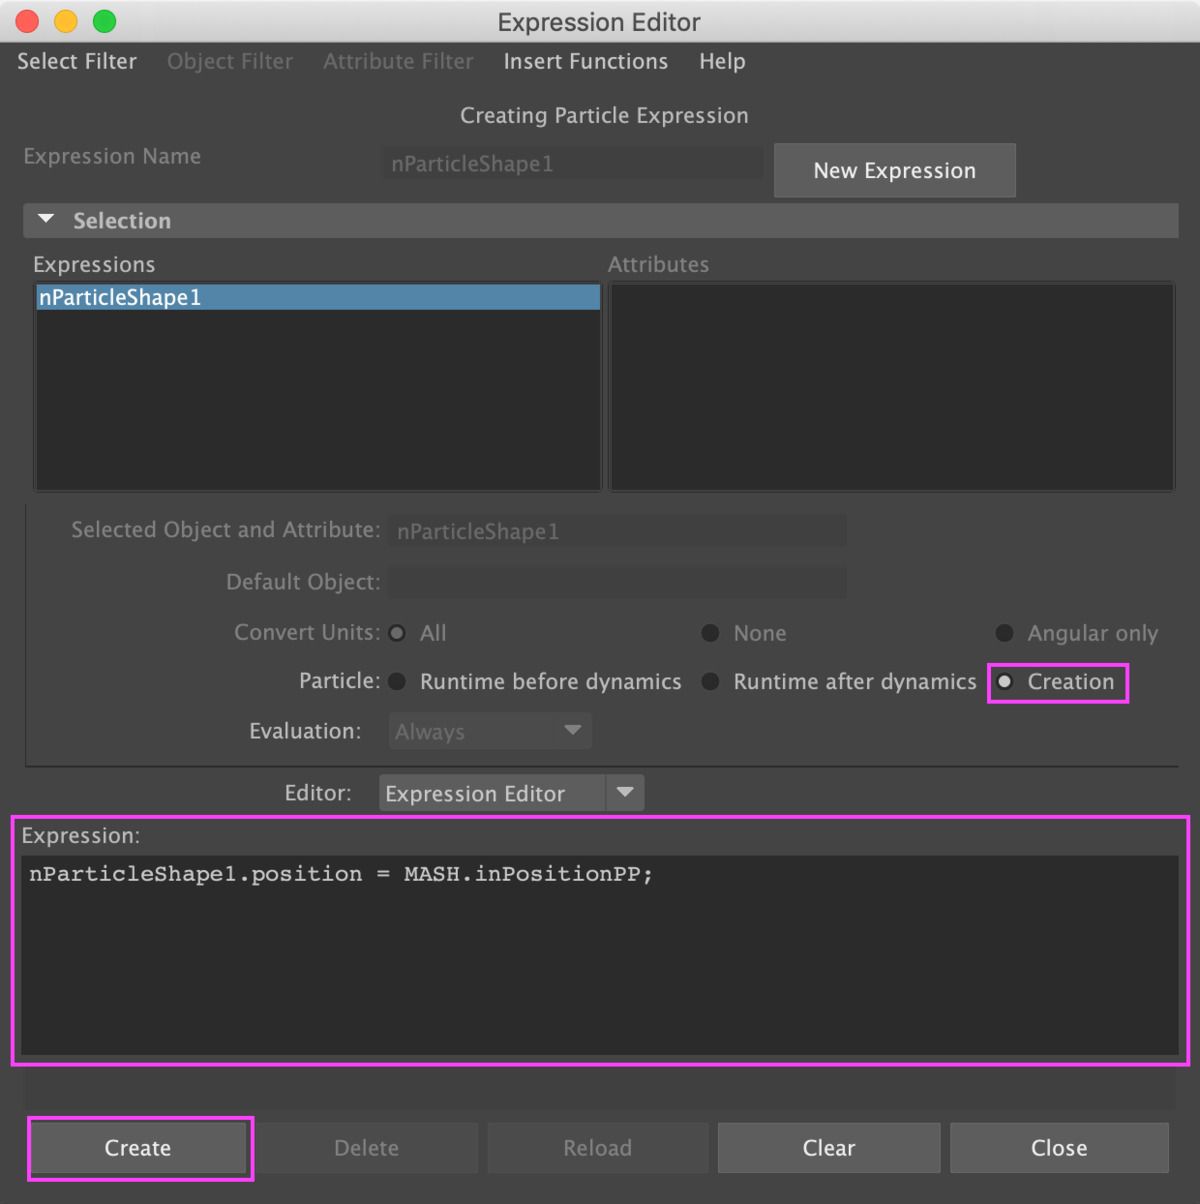
To allow evaluation at the start frame we have to add the same expression at Creation. Open the Expression Editor panel, then copy the runtime expression, switch view to Particle | Creation, and paste it in the expression box there. Click Create.
Note: You can view the expressions you wrote by filtering By Expression Name in the Expression Editor menu (Select Filter -> By Expression Name).

Now if you hit Play in the timeline, the animation should loop seamlessly once it hits frame 120.
Connect Additional Attributes
There are other attributes you can use to drive nParticles such as scale and visibility. You can list them by selecting the MASH node, opening the Node Editor (Windows -> Node Editor), then clicking on the following buttons sequentially:
- Clear the graph
- Input and output connections
- Show connected attributes on selected nodes
Locate the MASH node and you should see under Translate In PP, a list of attributes that can be used as output.
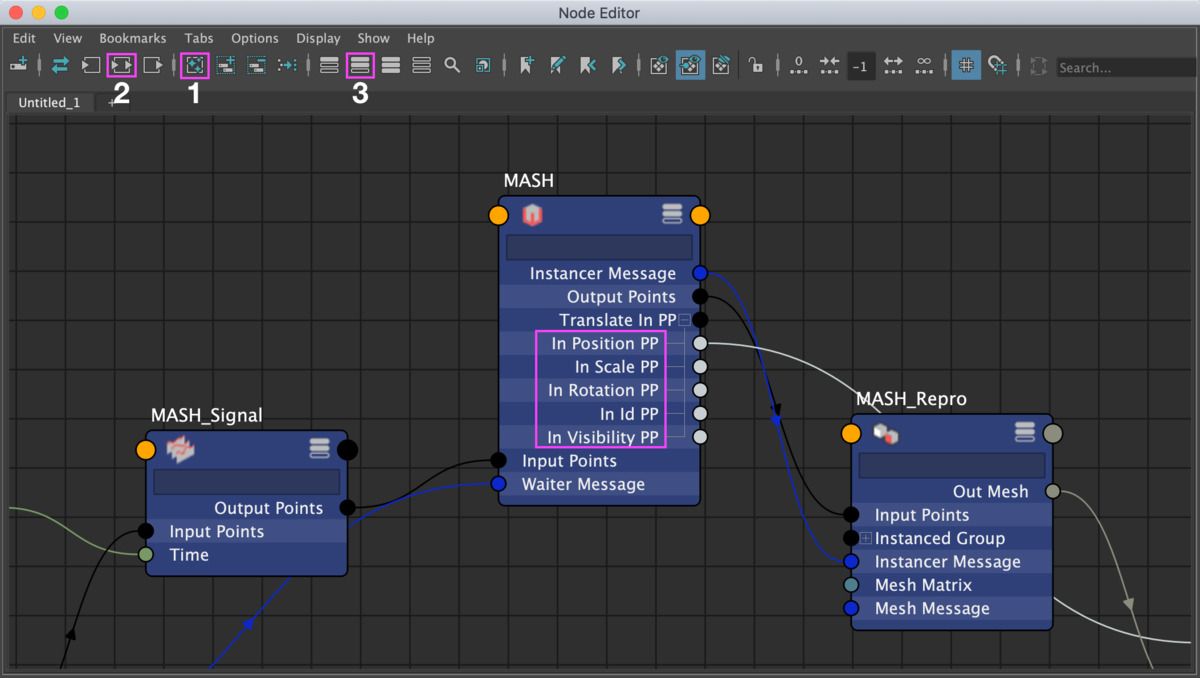
In the expression editor they can be accessed using their long name. (Make sure MASH matches the name you assigned to your MASH network).
Nice Name: long name
- In Position PP:
MASH.inPositionPP - In Scale PP:
MASH.inScalePP - In Rotation PP:
MASH.inRotationPP - In Id PP:
MASH.inIdPP - In Visibility PP:
MASH.inVisibilityPP
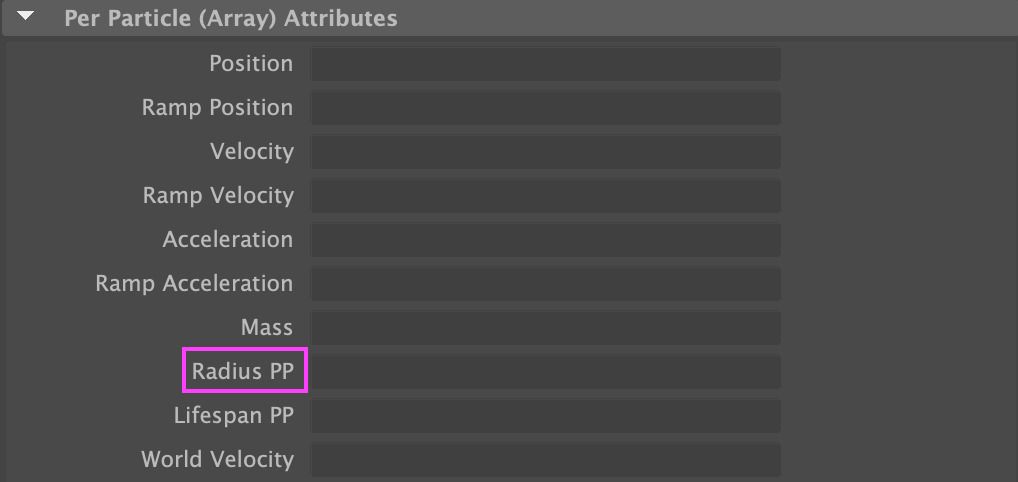
Depending on the attributes you are working with, you may need to setup new Per Particle attributes. For example, if you want to drive the per particle radius, you first need to add that attribute to the Per Particle (Array) Attributes.
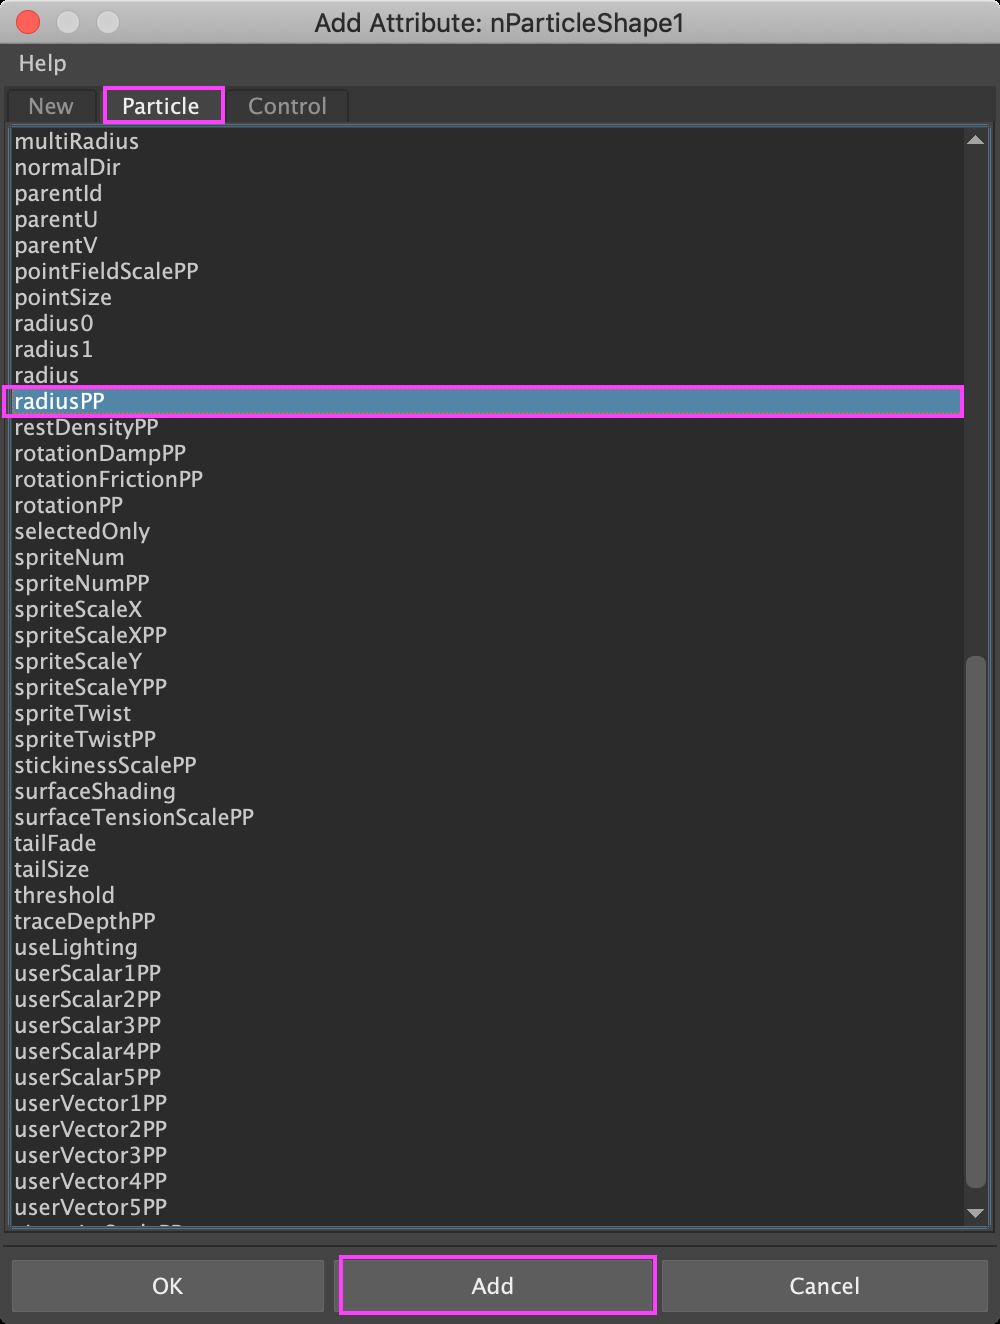
Go to the Add Dynamic Attributes section (nParticleShape). Click on the General button.

The Add Attribute panel should show up. Switch to the Particle view. Scroll and locate the radiusPP attribute, then click on the Add button.
The new attribute should be added to the array. You can then proceed adding creation and runtime expressions using the MASH.inScalePP parameter.
Additional Resources
Note: Those links are for Maya 2020, for your version of Maya, simply swap the version number (e.g. 2020) in the browser URL path with your own version number, for each link.
Particle Expressions Official Reference (Maya 2020):

MASH Official Reference (Maya 2020):
Maya (2020) Official Reference: