SAN Organization
Start by creating a new SFP EP folder at this location, unless it already exists:
/PHIL ROSENTHAL/Somebody Feed Phil/SFP_SEASON_05/EPISODE GRAPHICS
Then go to the template folder and duplicate it. This project features:
- phone composit
- full screen treatment
- Google UI replacement
Found on the SAN at:
/PHIL ROSENTHAL/Somebody Feed Phil/SFP_SEASON_05/DUO CALL TEMPLATE
Rename the project file and folder with the relevant EP number and GFX code:
e.g: SFP_507_GFX 02_Duo Call Fix-220221-DA
Then move it to the new EP folder created.
Getting Started
Open the project file and import the relevant assets:
Ideally the assets should come in at the following resolutions:
| File | Resolution |
|---|---|
| Sequence Reference | 1280x720 |
| Phone Backplate | 4096x2160 |
| Phil PiP | 1920x1080 or higher |
| Phil Fullscreen | 1920x1080 or higher |
| Google UI Footage | 2340x1080 |
Full Sequence Preview (Optional)
The Full Scene Preview comp - found in the 01 RENDER COMPS folder in the AE project has the entire sequence of the clips laid out, matching the ref.
This takes some time to setup but can be useful to then preview the sequence in full.
PiP Phone Composit
Comp name: PiP Phone - includes 4 layers.
Workflow
- Replace
layer 4with the Phone Backplate shot.CTRL ALT /(WIN),CMD OPT /(MAC). - Adjust the Power Pin corners of the
layer 2 - PiP MATTEto match perspective and overlay the current PiP of the backplate.- Tip: increase the expansion values for the effect to ensure the PiP below is properly covered.
- Tip: lower opacity of
layer 3to see the original PiP of the backplate. - Note: The Power Pin effect on
layer 3references the Power Pin onlayer 2and translates each corner point coordinate to match a 1920x1080 footage size (half the size). If the Phil PiP footage received is at 1280x720 or UHD, then adequately change theFootage ResolutionDropdown Menu in thelayer 3effects panel.
- Replace
layer 3with the PiP Phil shot, then adjust the position and scale from the Transform effect to center Phil. Also apply any color correction.
Tracking for Cam Shake
One way to spot camera shake is to toggle between the start and end of the composition and notice if the backplate has shifted in position - if there is a change then tracking is likely required.
- Open Mocha from the
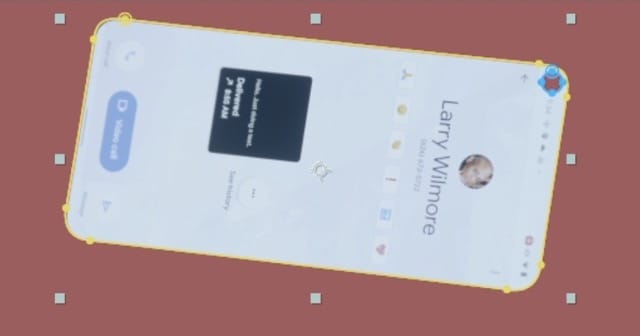
layer 4effects panel. - Use the circular spline tool to trace a circle around the black camera pin hole. If it's blurred out too much then use the specular highlight on one of the phone buttons that should offer a decent contrast point.
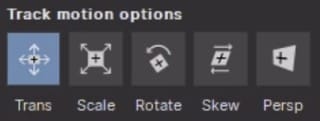
- Set the Track Motion Options to
Transformonly.

- Track, Save, and Exit.
- Create the tracking data and assign it to the
tracklayer Null with the Export Option set toTransform.

Both Transform effects (in layers 2 and 3) reference this track layer position. To prevent breaking the current position of the PiP (since you've already aligned or want to adjust the position further), only the relative difference between each tracked frame is added. This is calculated via an expression - set in the Transform effect position of both layers.
Expression References
Power Pin Resolution Translation
Applied to each corner of the Power Pin effect in the Phil PiP Capture layer 3. Adjust for each corner ("Top Left"), ("Top Right"), ("Bottom Left"), ("Bottom Right").
pt = thisComp.layer("PiP - MATTE").effect("CC Power Pin")("Top Left").value;
res = effect("Footage Resolution")("Menu").value;

offset = {
    1: 0,
    2: [thisComp.width/4 + 256/4, thisComp.height/4],
    3: [thisComp.width/3 + 256/6, thisComp.height/3]
}[res]

pt-offset
Cam Tracking Offset
Set in the position property of the Transform effect for both the PiP - MATTE and Phil PiP Capture layers
const track = thisComp.layer("track");
const track_origin = track.position.numKeys > 0 ? track.position.key(1).value : [thisComp.width, thisComp.height]/2;
const delta = track.position - track_origin;
value + delta;
PiP Fullscreen Composit
Comp name: PiP Fullscreen - includes 3 layers.
Workflow
- Replace
layer 3with the Phone Backplate shot.CTRL ALT /(WIN),CMD OPT /(MAC). - Adjust the
PiP - MATTEposition and scale to overlay the backplate PiP. - Replace
layer 2with the PiP Phil shot, then adjust the position and scale to center Phil. Also apply any color correction.
Google UI Composit
Comp name: Google UI - includes 3 layers.
Workflow
- Replace
layer 5with the ref shot.CTRL ALT /(WIN),CMD OPT /(MAC). - Replace
layer 3with the Phone Backplate shot. - Replace
layer 1in theGoogle UI - PREcomp with the Phone Backplate shot, then adjust both masks around the active screen area, and camera hole (subtract).

- Replace
layer 1in theGoogle UI - SRCcomp with the Google UI capture clip and adjust the mask if necessary - the mask was initially placed to clear a hairline of white border... - Keyframe animate the gradient ramp of
layer 2so that it matches the animation oflayer 1(sample animation in template). - Go back to the
Google UI - PREcomp and adjust the perspective using the Power Pin effect parameters onlayer 2. Finetune placement with the Transform effect.- Note: Ideally the 5G/Battery icons of the UI are middle-aligned with the camera hole.
- Go back to the main
Google UIcomp and make sure the timing of the animation matches the ref, adjust if necessary. - If the shot features a reflective surface, turn on
layer 1and adjust theSkewvalues in both Transform effects - one adjusts the perspective horizontally, the other vertically. - Finally adjust the
Blur Maplayer gradient to match the blur of the phone backplate.- Tip: Move the
Blur Maplayer to the top and set the blend mode toMultiplyorScreento visualize the gradient ramp overlaid to the backplate. - Note: Black is transparent / White is blurred - can be inverted from the Cam Blur effect.
- Tip: Move the